Getting Started with Your ISSINE eTires Catalogue
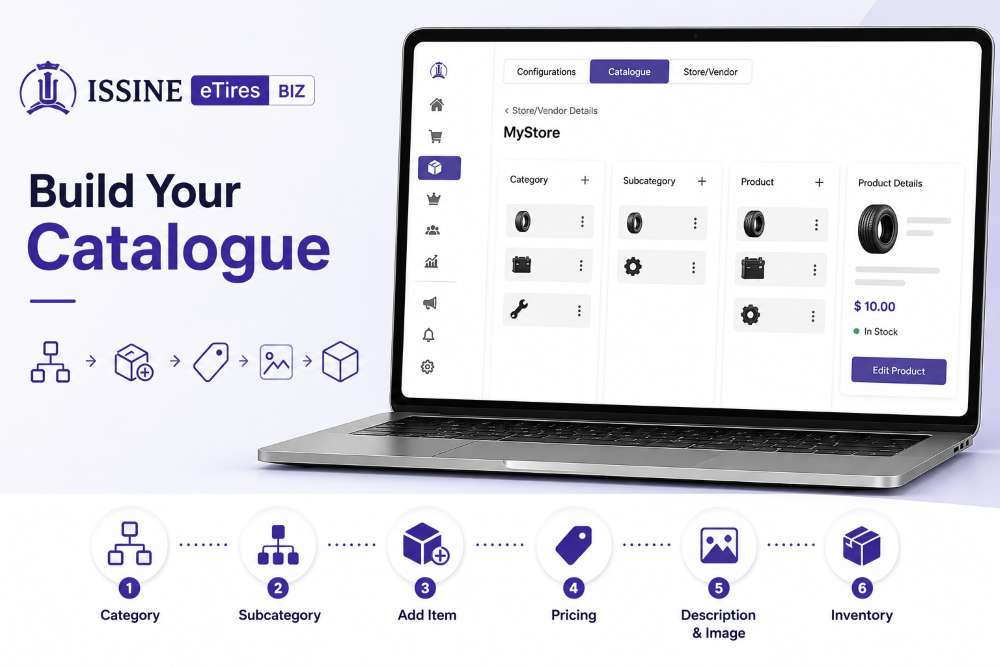
Once your ISSINE eTires Biz account is set up, the next important step is building your catalogue.
Your catalogue is the structure customers will use to discover what your business offers. Whether you sell tires, automotive parts, accessories, batteries, or provide automotive services, organizing your catalogue correctly makes your store easier to navigate and prepares your products and services for online discovery.
The basic structure is simple:
Category → Subcategory → Product or Service
You do not need to build your entire catalogue at once. Start with your main business offerings, make sure they are presented correctly, then expand progressively.
1. Open Your Catalogue
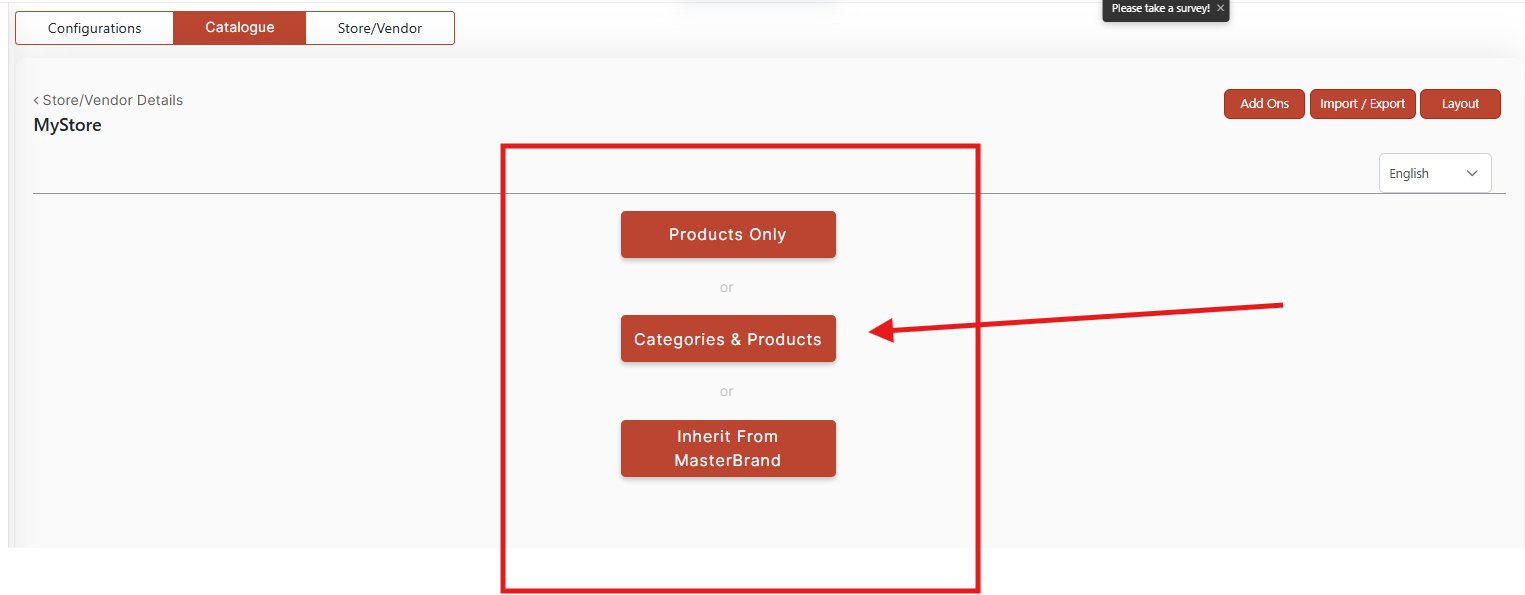
From your ISSINE eTires Biz Dashboard, go to:
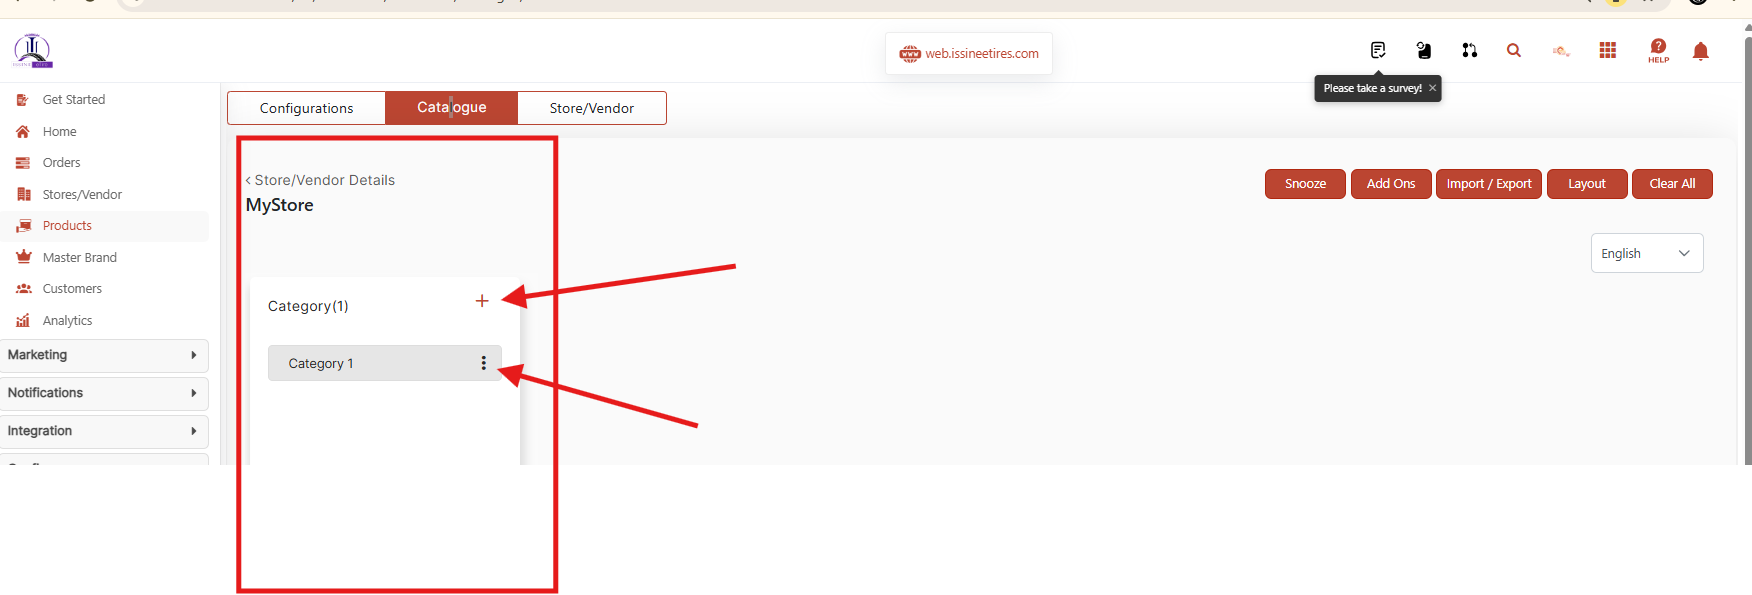
Products → Catalogue
Your catalogue workspace displays your Store/Vendor name and the categories currently associated with your store.
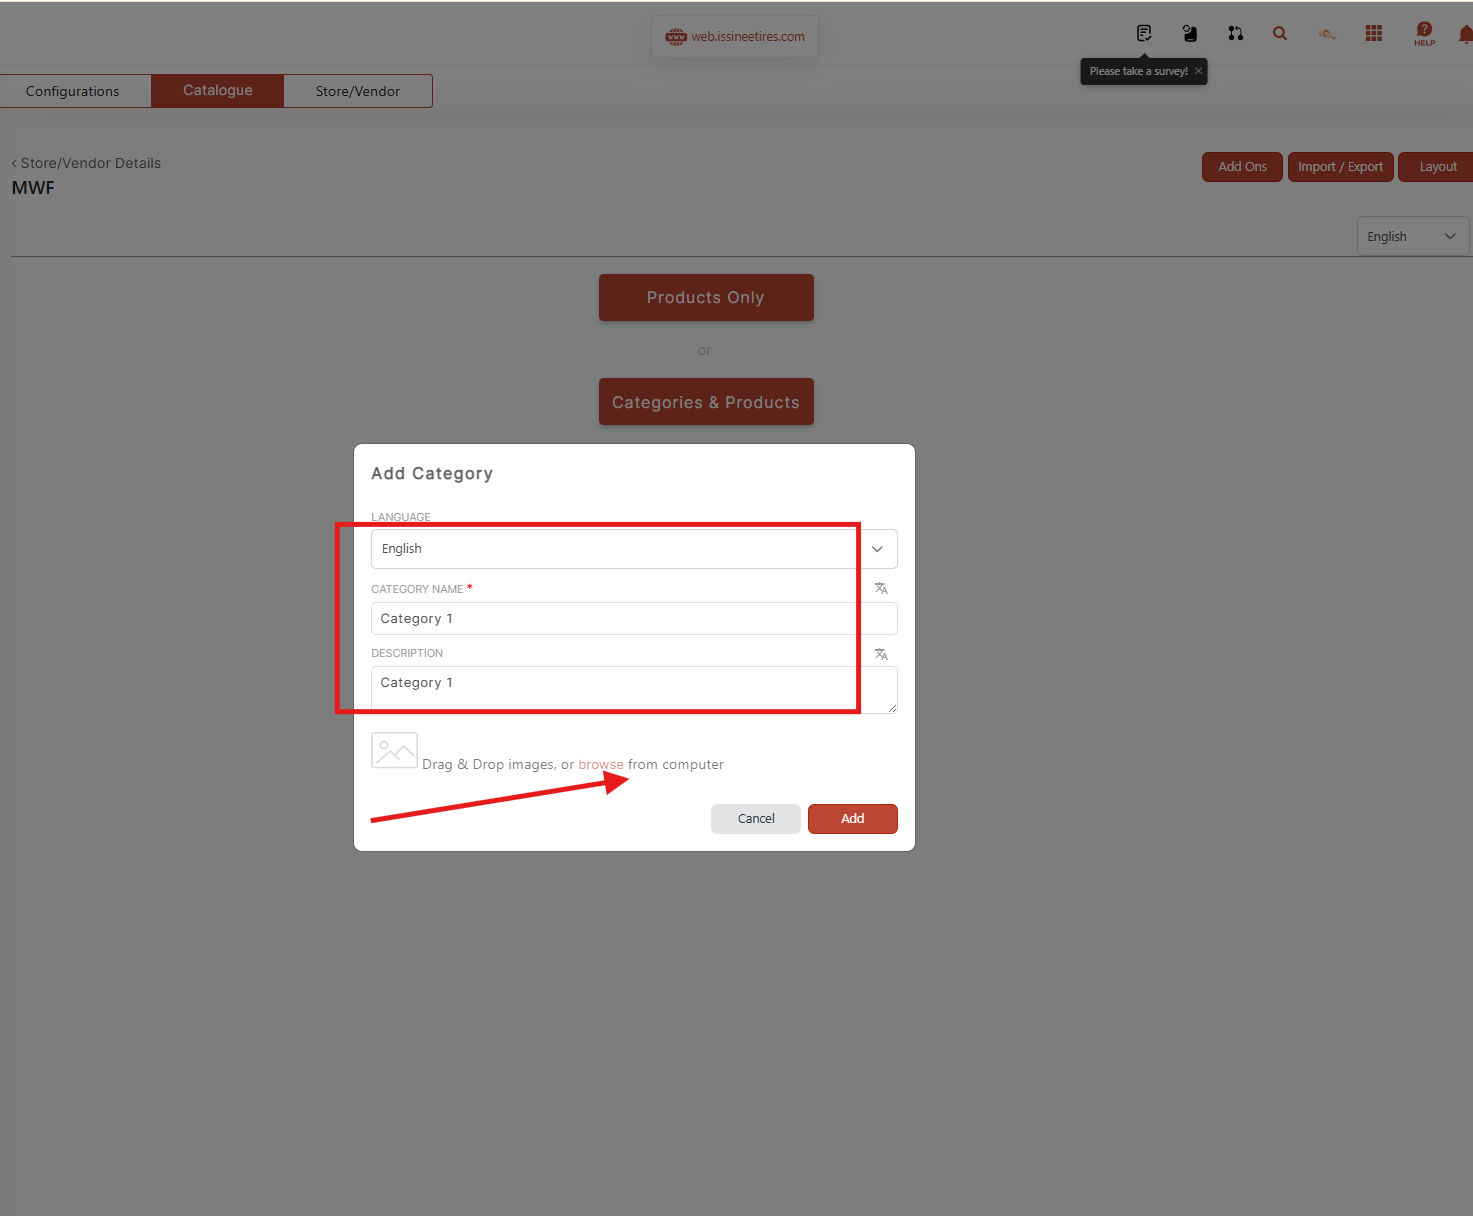
To begin, click the + next to Category.
A category represents one of the main groups of products or services offered by your business.
For example:
Tires
Batteries
Auto Parts
Accessories
Maintenance Services
Repair Services
Choose categories that reflect what your business actually provides. Keeping the structure simple will make your storefront easier for customers to understand.
2. Create Your Subcategories
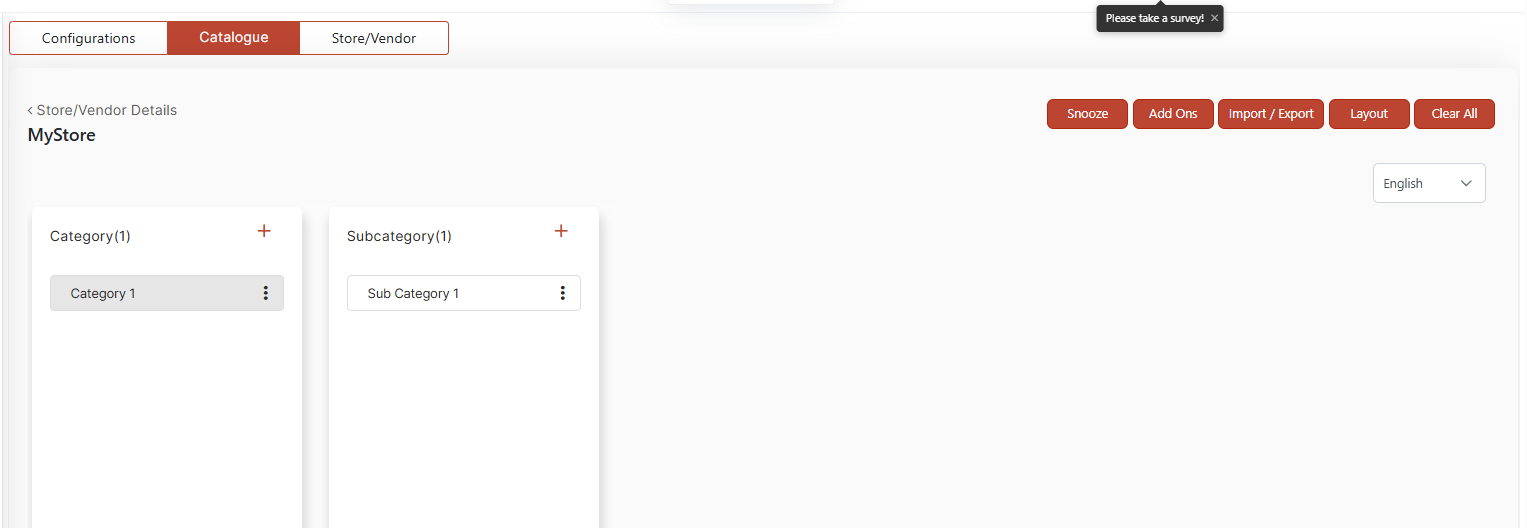
After creating or selecting a category, you can organize it further using Subcategories.
Select your Category and click the + next to Subcategory.
For example:
Category: Tires
Possible subcategories could include:
Passenger Tires
SUV and Light Truck Tires
Commercial Tires
Used Tires
For an automotive service provider:
Category: Automotive Services
Possible subcategories could include:
Oil Change
Brake Service
Wheel Alignment
Tire Installation
The objective is not to create as many categories as possible. Build a structure that helps customers quickly understand and find what you offer.
3. Add Your First Product or Service
Once your Category and Subcategory are ready, select the appropriate Subcategory and click the + in the Product section.
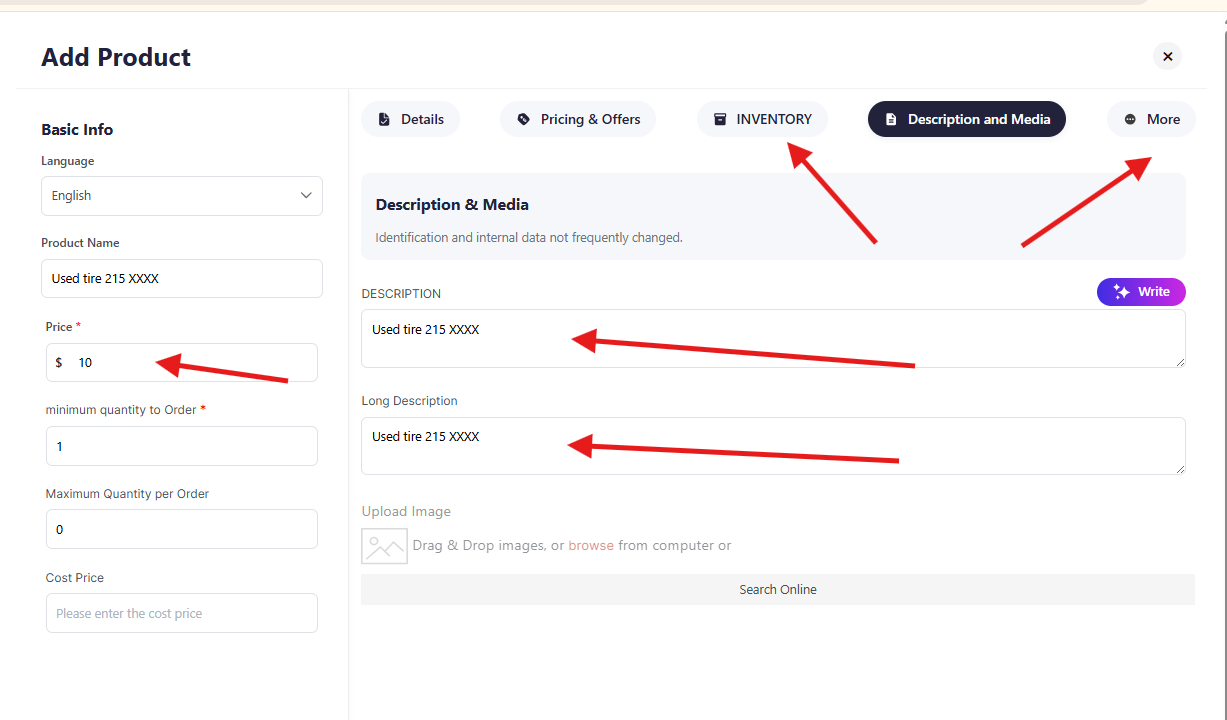
The Add Product workspace will open.
Start with the Basic Info section.
Enter the:
Product Name
Selling Price
Minimum Quantity to Order
Maximum Quantity per Order, when applicable
Cost Price, when appropriate for your internal management
Use clear product names that customers can immediately understand.
Instead of:
Used Tire
Use something more specific, such as:
Used Tire 215/60R16
For services, the same principle applies:
Front Wheel Alignment
is more useful than simply:
Alignment
4. Complete the Product Details
The product workspace provides several sections:
Details
Pricing & Offers
Inventory
Description and Media
More
You do not necessarily need every option when creating your first item.
Start with the information customers need to understand what you are offering.
Under Details, you can complete relevant product information, preparation time, search tags and other available fields.
Search tags can help organize and improve the discoverability of your items.
For example, a tire listing might use terms such as:
215/60R16, used tire, passenger tire, all-season
Keep tags directly related to the product.
5. Add a Good Description and Image
Go to Description and Media.
Complete the Description and Long Description fields with useful information about the product or service.
For example:
Description:
Used 215/60R16 passenger tire in good condition.
Long Description:
Quality inspected used 215/60R16 tire suitable for compatible passenger vehicles. Contact the store to confirm availability, condition and installation options.
Then upload a clear image representing the actual product whenever possible.
Good images matter. Customers should be able to quickly recognize what they are considering buying.
For services, you can use a professional image representing the service or your business facility when an individual product photograph is not appropriate.
6. Review Pricing, Offers and Inventory
Use Pricing & Offers when you need to configure additional pricing or promotional options available through the platform.
Use Inventory when you need to manage product availability or quantities.
Inventory is especially important for physical products such as tires, batteries, accessories and automotive parts.
For service-based offerings, inventory settings may not always be relevant.
Do not activate or configure options simply because they are available. Use the features that correspond to how your business actually operates.
7. Review Your Product
Once the item has been created, return to your Catalogue.
You should now see the complete structure:
Category → Subcategory → Product → Product Details
Review the listing carefully.
Check the product name, price, description, image and other relevant information before considering the item ready for customers.
If something needs to be changed, open the product again and edit the appropriate section.
Build Your Catalogue Progressively
You do not need 50 products to get started.
A smaller, well-organized catalogue is better than a large catalogue filled with incomplete information.
Start with your strongest products and services.
Create your Categories → Organize Subcategories → Add Products or Services → Complete Pricing → Add Descriptions and Images → Review → Expand
As your business grows on ISSINE eTires, continue adding products, updating availability, improving descriptions and keeping pricing current.
Your catalogue is not simply a list of products. It is the foundation of how customers discover and understand your business online.
ISSINE eTires
Connecting drivers with the professionals who keep them moving.
Need help? Contact the ISSINE eTires Digital Team at support@issineetires.com for onboarding assistance.
31
Views
0
Likes
0
Comments
0 Comments
No comments yet. Be the first to comment!